This tutorial describes how to make a Hugo based website available for everyone over the Internet. The website would be automatically rebuilt every time we promote a change to the code repository. All of this for free.
Preconditions
A local website generated build with Hugo - see “A website using Hugo” tutorial.
Overview
Hosting of static websites is provided by many services and in this tutorial we will use one of them: render.com. Render can build a Hugo website basing on the source code. It has an integration with GitHub and can automatically rebuild the website every time we commit a change.
Github
We will use Github to store the source files for our website. If you don’t have a github account, please register using https://github.com/signup.
After registration, please download and install the GitHub Desktop App. In the app, go to “File” and “New Repository”. In the new window, specify the name for your new repo and add description. Set the local path to C:\Hugo\Sites.
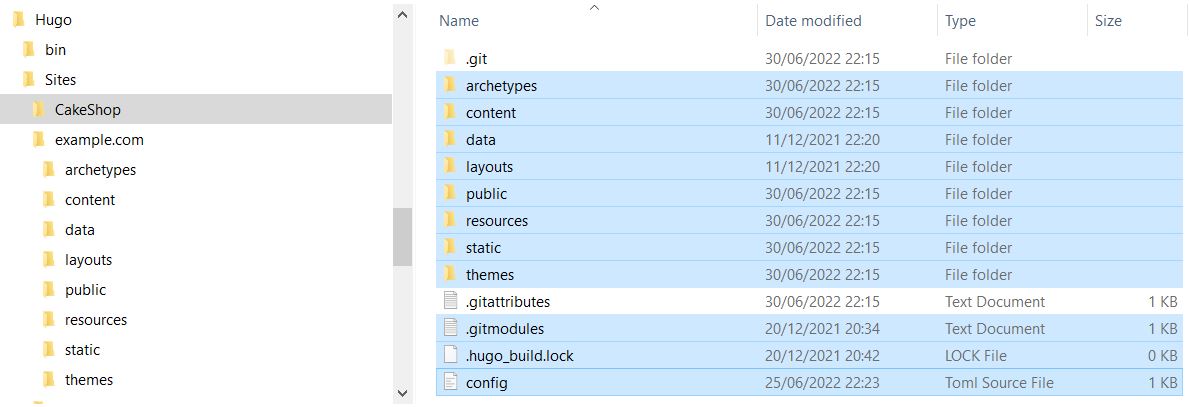
Open the C:\Hugo\Sites in the file explorer. Inside, you should see a new folder with the name your previously defined. The next step is to copy all the folders and files from your Hugo website folder (in my case example.com) to the new github repo folder.Once you copied the file, see if you can build the website from this folder using the standard hugo serve -D command in the command line. From now on, you would only update the files in the folder. The old folder could be renamed and kept as a backup.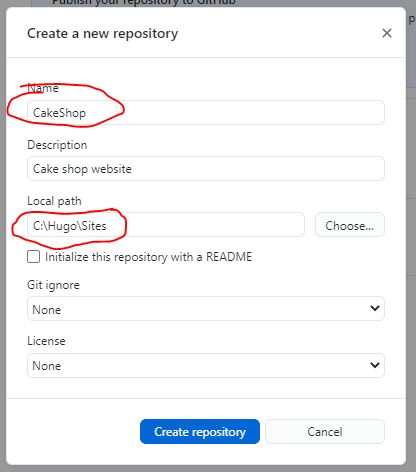
Switch over to the GitHub Desktop app. You should see a lot of files listed as changed. GitHub App has detected that we have added something to the repo folder.
Type “the first commit” into the summary field below the list of files and click Commit to main.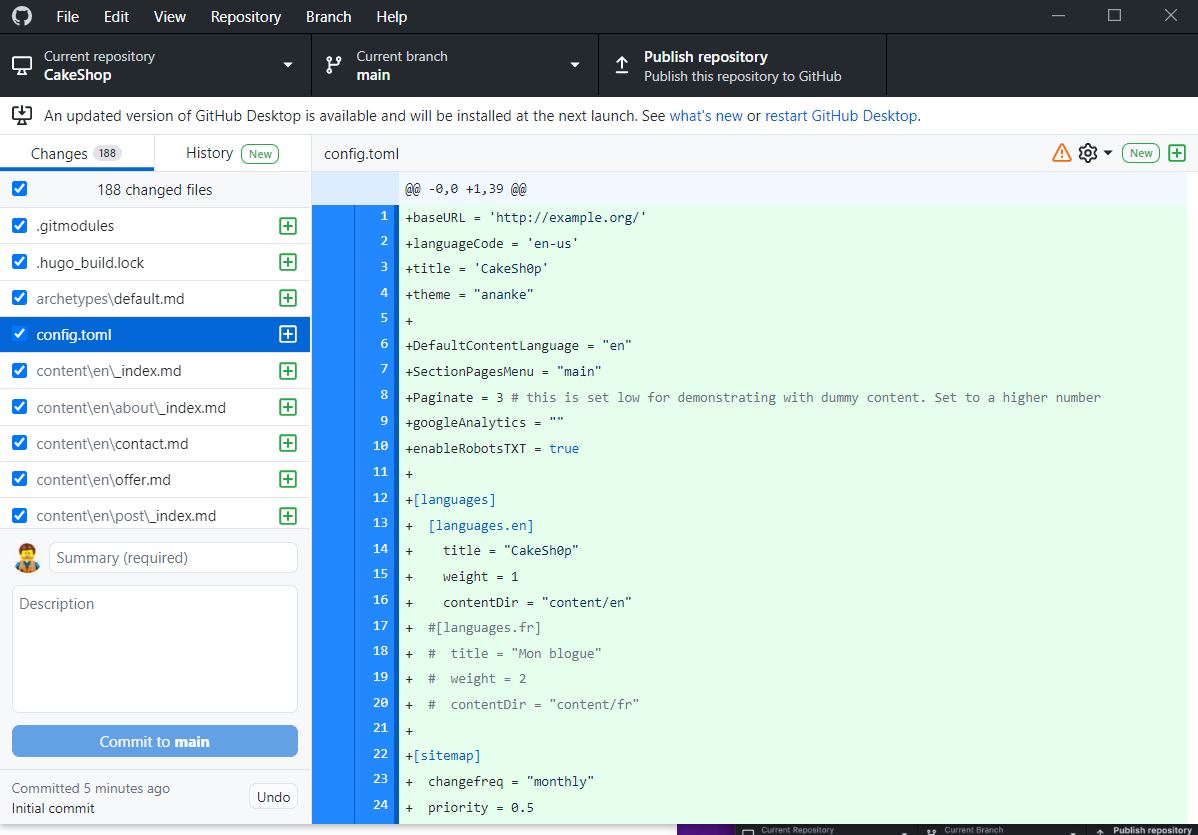
The final step is to copy your local repo with all the content to the GitHub servers. Click Publish repository on the top menu. Once the upload is finished, go to github.com and check if your repository and the list files are there.
Render
Sign up to Render using your Github credential via https://dashboard.render.com/register?next=/.
Follow the instruction HERE to deploy your website from the GitHub repo we created in previous steps. If you don’t see your repository on the list, you might need to add it via Configure account under GitHub panel in Render.
Once the deployment is finished, check if your website is available under the URL provided by Render.
Website update
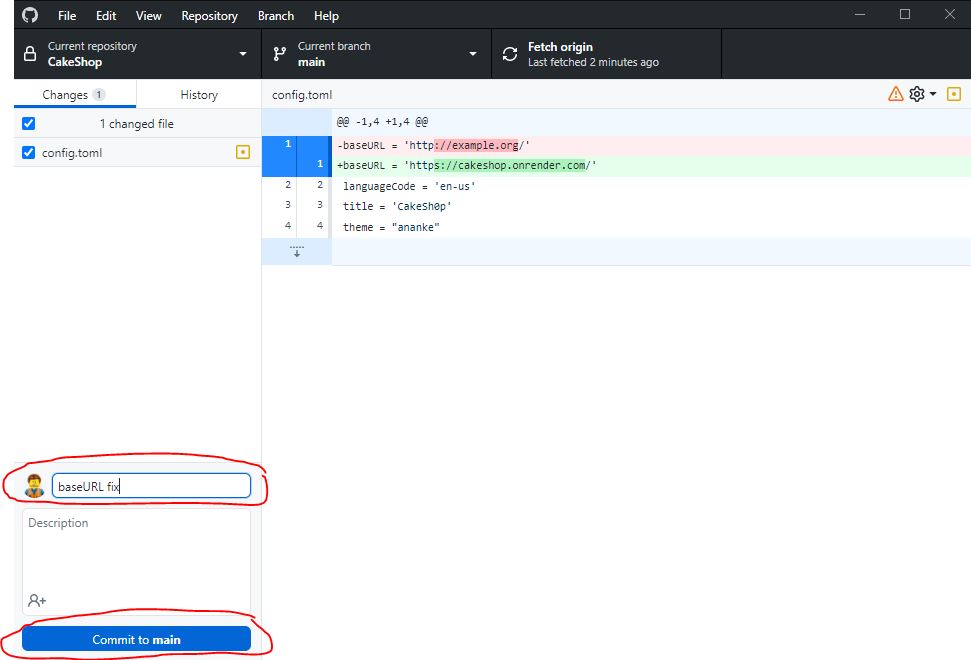
Your website should be now fully functional but there’s a problem with some of the images. This is because the baseURL parameter is not set to the location of our website. Open the config.toml file from your local git repository and update it with your website address.
Once you saved the file, you should see a new change detected in the GitHub Desktop app. Add a description of the change in the summary field and commit the changes.We still need to copy the remote GitHub repository called “Origin”. Click on “Push origin”.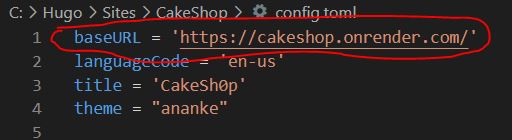
At this point Render should pick up the change and start deployment. You can observe this on the Render Dashboard. Once deployment is live, check your website. You can publish other changes in the same way.
The last thing to mention is that all the posts with “draft: true” line in the front matter would not be displayed as they are deemed not ready. To have them displayed, either remove the line or update to “draft: false”.