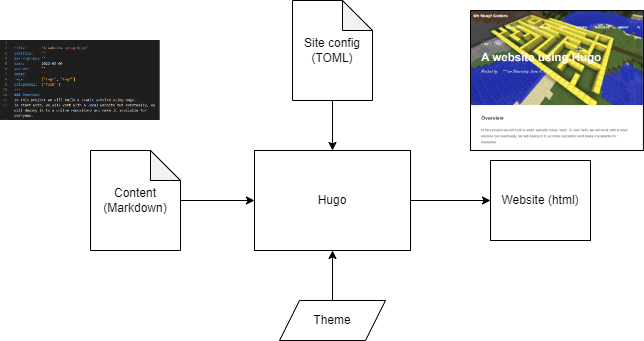
This tutorial will describe how to build a static website using Hugo. The main programming language utilised in Websites is the HTML. To see an example of HTML code, right click on this page and choose “View page source”. It is pretty complicated, especially if you want to build professionally looking pages. Hugo allows us to build beautiful websites without the need of knowing HTML.
To start with, choose an imaginary company you would build the website for. It might be a football school, cake shop or any other business.
Design
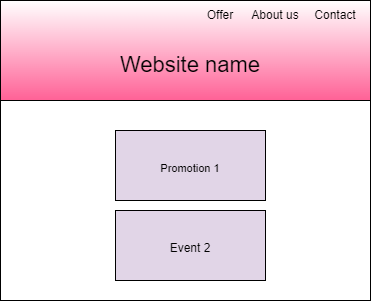
The website we are building will include some basic information about the company, the offer and announcements about promotional events. See the high level design:
Install Hugo
Follow Hugo installation steps for Windows in here
Instructions for other operating systems are here https://gohugo.io/getting-started/installing.Install the editor
A good code editor will make the web development much quicker. While developing Hugo websites, we will be using Markdown files for defining content of the pages and TOML for configuration. A good choice for both of these languages might be Microsoft Visual Studio Code. It has out of the box Markdown support and you can easily add “Better TOML” extension from within the tool.
A basic website
Next step is to create a blank website and configure it. Within the command line move to the “Sites” folders and type the below command
cd c:\Hugo\Sites\
hugo new site example.com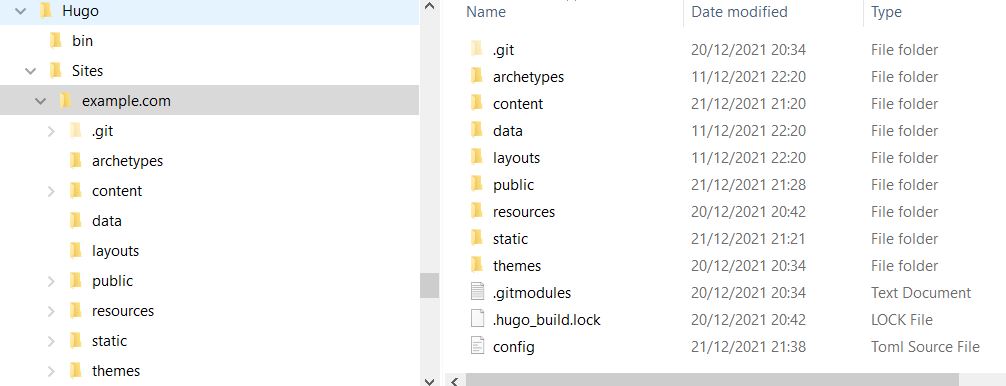
Each Hugo website needs to use a theme which would be the main UI framework.
Hugo community offers extensive number of free themes. For this project we will start with “Ananke” theme demo site.
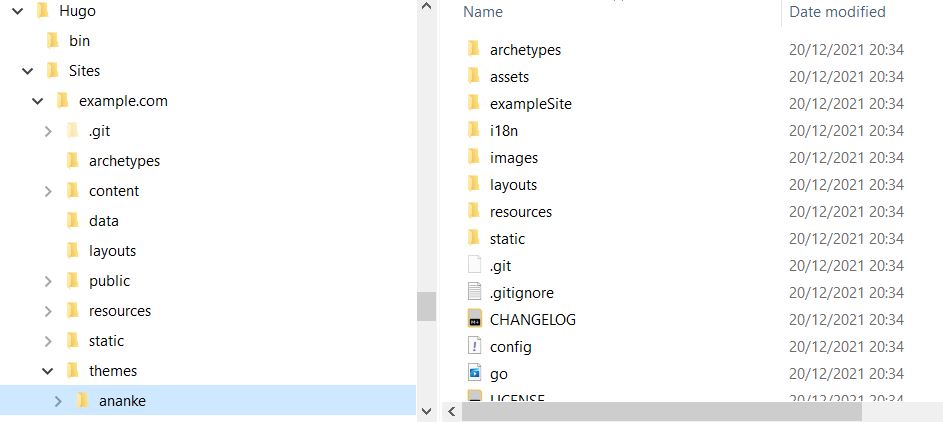
Download the Ananke theme as a zip from github https://github.com/theNewDynamic/gohugo-theme-ananke/archive/refs/heads/master.zip. Once downloaded, copy the extracted content into “themes” folder of your website and rename the folder to “ananke”.
Your folder structure should look like this:
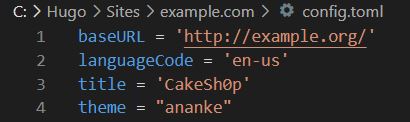
We’ve copied the theme files and the next step is to configure the website to use it. Locate the “config.toml” file in “example.com” folder and open it for editing. Update the title value to a name of your imaginary business and add a new line to define the theme as below
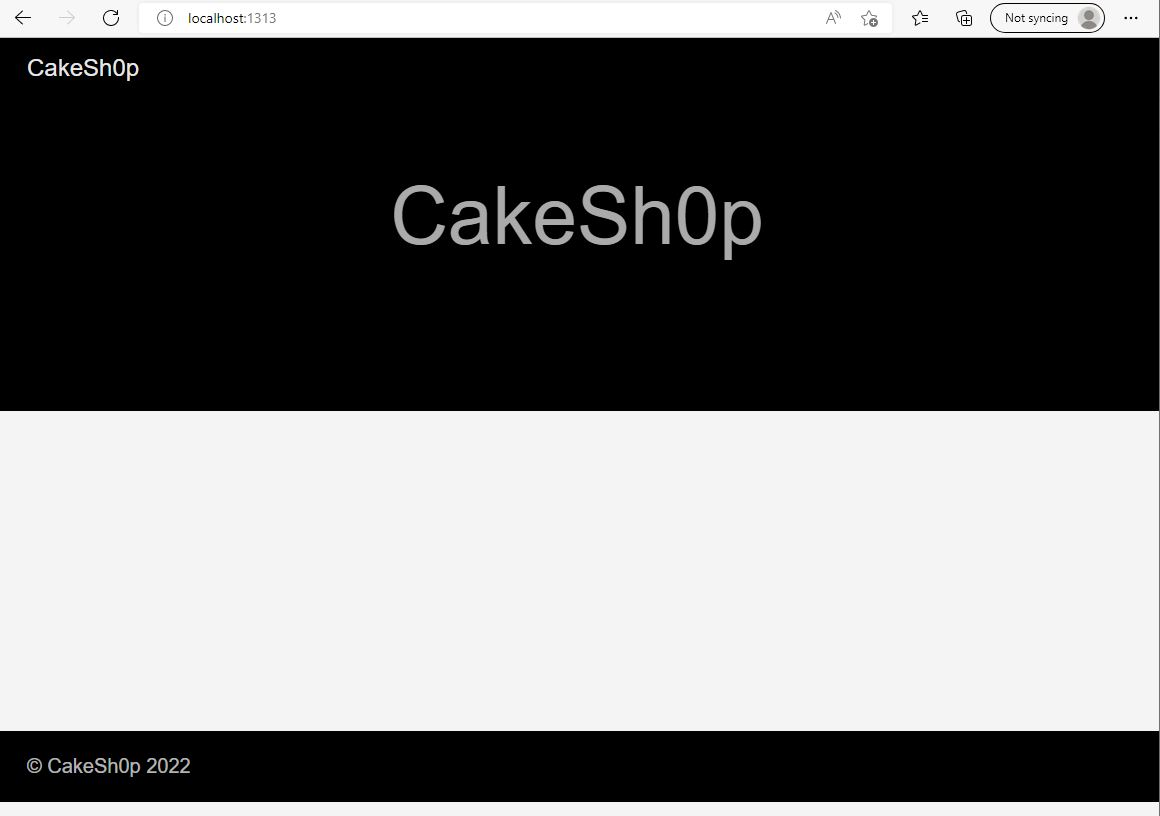
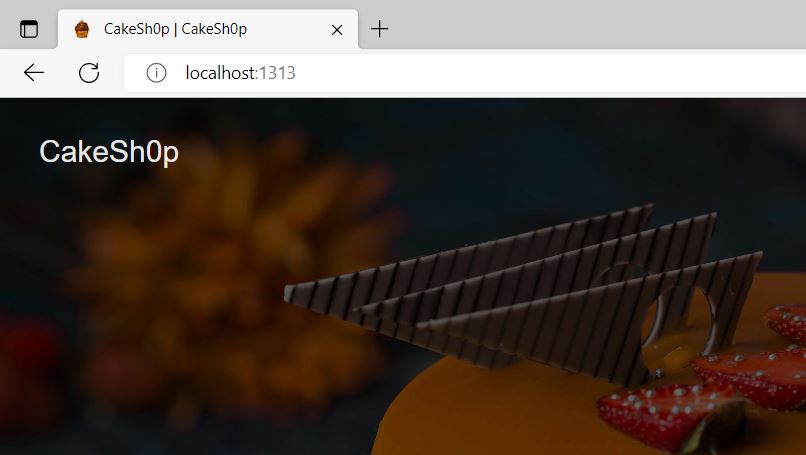
The website is now ready to be built. In your command line navigate to your website folder and execute “Hugo serve” command.
cd c:\Hugo\Sites\example.com\
hugo serve -D
Your website should be available under http://localhost:1313/ and look like
Explore what the Ananke theme offers
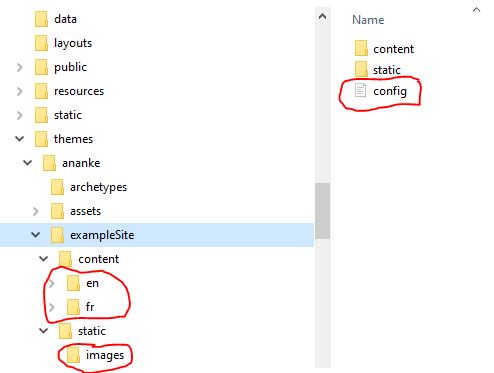
At this point your website would look very basic. Let’s copy some of the content from the “exampleSite” folder inside Ananke theme location.
Please copy :
- “en” and “fr” folders from “content” folder in the exampleSite to C:\Hugo\Sites\example.com\content.
- “images” from “static” folders from the exampleSite to C:\Hugo\Sites\example.com\static.
- “config.toml” file from the exampleSite folder into C:\Hugo\Sites\example.com replacing the previous config file (you can rename it to config.bak.toml if you want to keep it).
One more steps is to update the edit the new C:\Hugo\Sites\example.com\config.toml. As in a step above, update the “theme” to “ananke” which is the exact name of the folder we are using.
Rebuild your website. You should see more content including two categories on the top right.
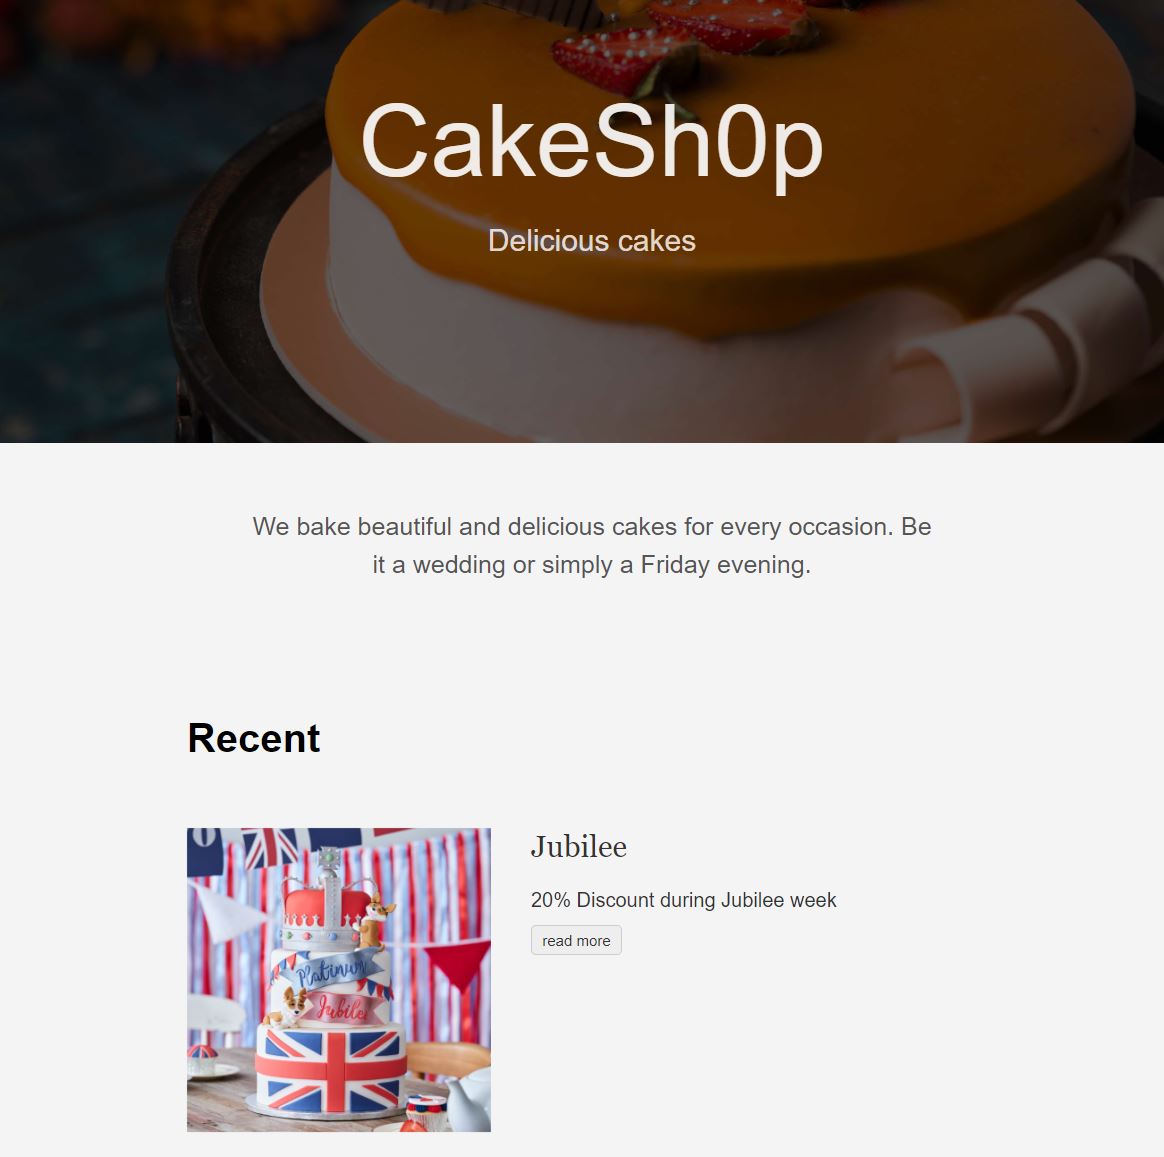
The main page image
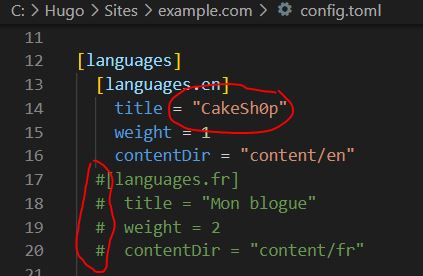
An image will be a key visual part of the main page. Search through the Internet for a free picture that would be a good representation of your business. It should have a horizontal orientation (ideally close to 1400x800 pixels but you can try others as well). Download the image into C:\Hugo\Sites\example.com\static\images folder. Now open for edit the main page for English version of the site C:\Hugo\Sites\example.com\content\en_index.md. Update the “featured_image” value to point to the name of the image you downloaded. In my case the image is named swapnil.jpg. Update rest of the content so that it reflects your business.
Your website could look like this.For now, we will not need the french language version. Edit the main “config.toml” file and comment out the fr section using “#” character. At the same time update the name of english version to the name of your website.Test your website.

The “About” page
To edit the “About” page open C:\Hugo\Sites\example.com\content\en\about_index.md file. Experiment with the content there. You can point the featured_image parameter to the same top image as on the main page. Below the front matter you can find a first example of Hugo shortcodes: Figure. Please modify it to show a picture of the business owner. You can download an AI generated fake image of a person from https://this-person-does-not-exist.com/en.

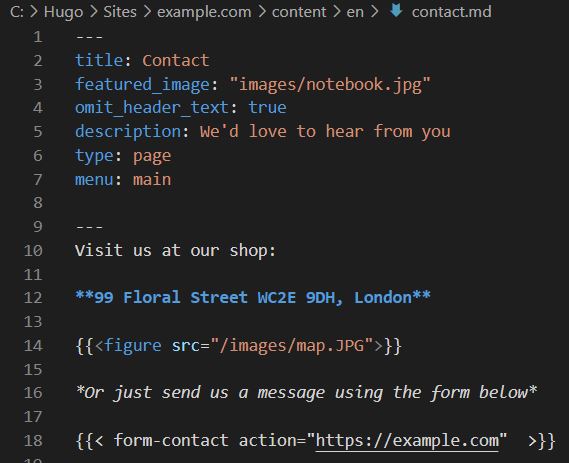
The “Contact” page
The “Contact” page already includes a form. We will add a fake location and a map at the top of the page. In an online map service, choose a spot where your business would operate and using the snipping tool capture an image. See some of the markdown formatting examples below. More info about formatting in markdown can be found here.
The “Offer” page
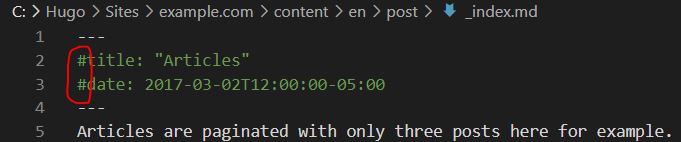
The “Offer” page should describe the services offered by the business. To start with, let’s hide the “Articles” page. Open the C:\Hugo\Sites\example.com\content\en\post_index.md file and add “#” in front of the front matter elements to hide it.
Let’s add the new page now. This can be done by creating a new .md file inside the “content/en” folder. In your command line terminal, ensure you are pointing to the main website folder (C:\Hugo\Sites\example.com in my case) and then execute the below instruction.
hugo new en/offer.md
Events and promotions
So far we worked on the top navigation and related pages. In addition to that, we will use posts to advertise special events or promotions. To start with lets remove the existing posts that we copied from the exampleSite (make sure you leave the _index.md file!).
Build your page. You should not see any posts on the main page now.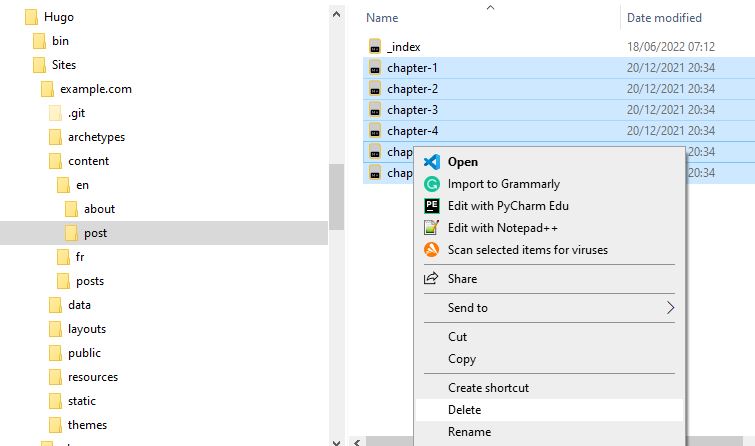
Let’s create a new promotional event. In my case that would be a discount for the platinum jubilee celebrations. Similarly as for the Offer page, we will create the page in the command line while being in the main website folder.
hugo new post/jubilee.md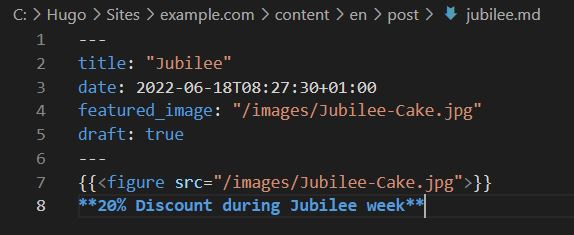
Let’s create a second post, this one could be about an event and include a video. Run the hugo new command again with a different file name. Use the youtube shortcode to embed a video.
Test your website. Do you see two post on the main page? Is the video working?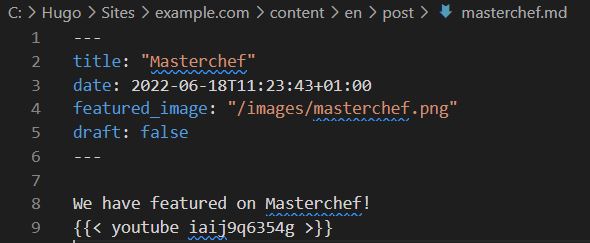
Favicon
Favicon is a square icon that browsers associate with a website. You can find it on the browser’s tabs and bookmarks list. Lets add it to our website. One way to find an icon related to your website is the browse online repositories like https://iconarchive.com/. You can also generate your own one using https://favicon.io/favicon-generator/. Your favicon icon should be in .png format and be copied into C:\Hugo\Sites\example.com\static folder. Once the favicon file is ready, open the config.toml file in your editor and locate the favicon parameter. Insert the name of your favicon file as a value.
Rebuild your website and check that you can see the favicon in your browser.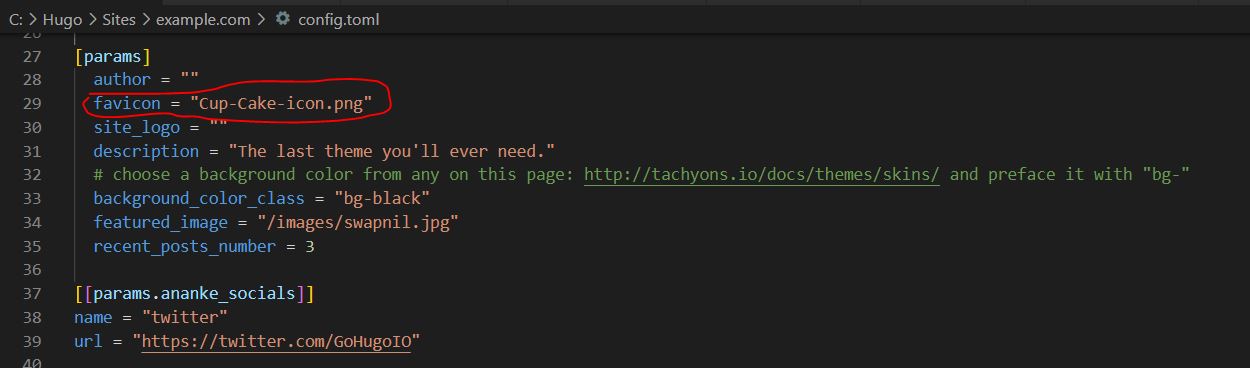
Further enhancements
Your website is ready now but you can learn more Hugo form: